

Food Shortage Series - Part 1 - Vacuum Sealing Dry Goods for Storage
Posted by Avid Armor on May 18th 2022
Food shortage and more recently, baby formula shortage, has become an increasing risk that is being brought to the forefront in many countries, including the United States. This is occurring due to the supply chain issues in many industries - including the farming industry, packaging, shipping, and so many more. Prices have also been rapidly increasing ("inflation"), which we have seen most in fuel and food. Due to this, the shelves in grocery stores are becoming less full, meaning by the end of this year, we might notice empty shelves and increased grocery prices as this risk becomes a crisis.
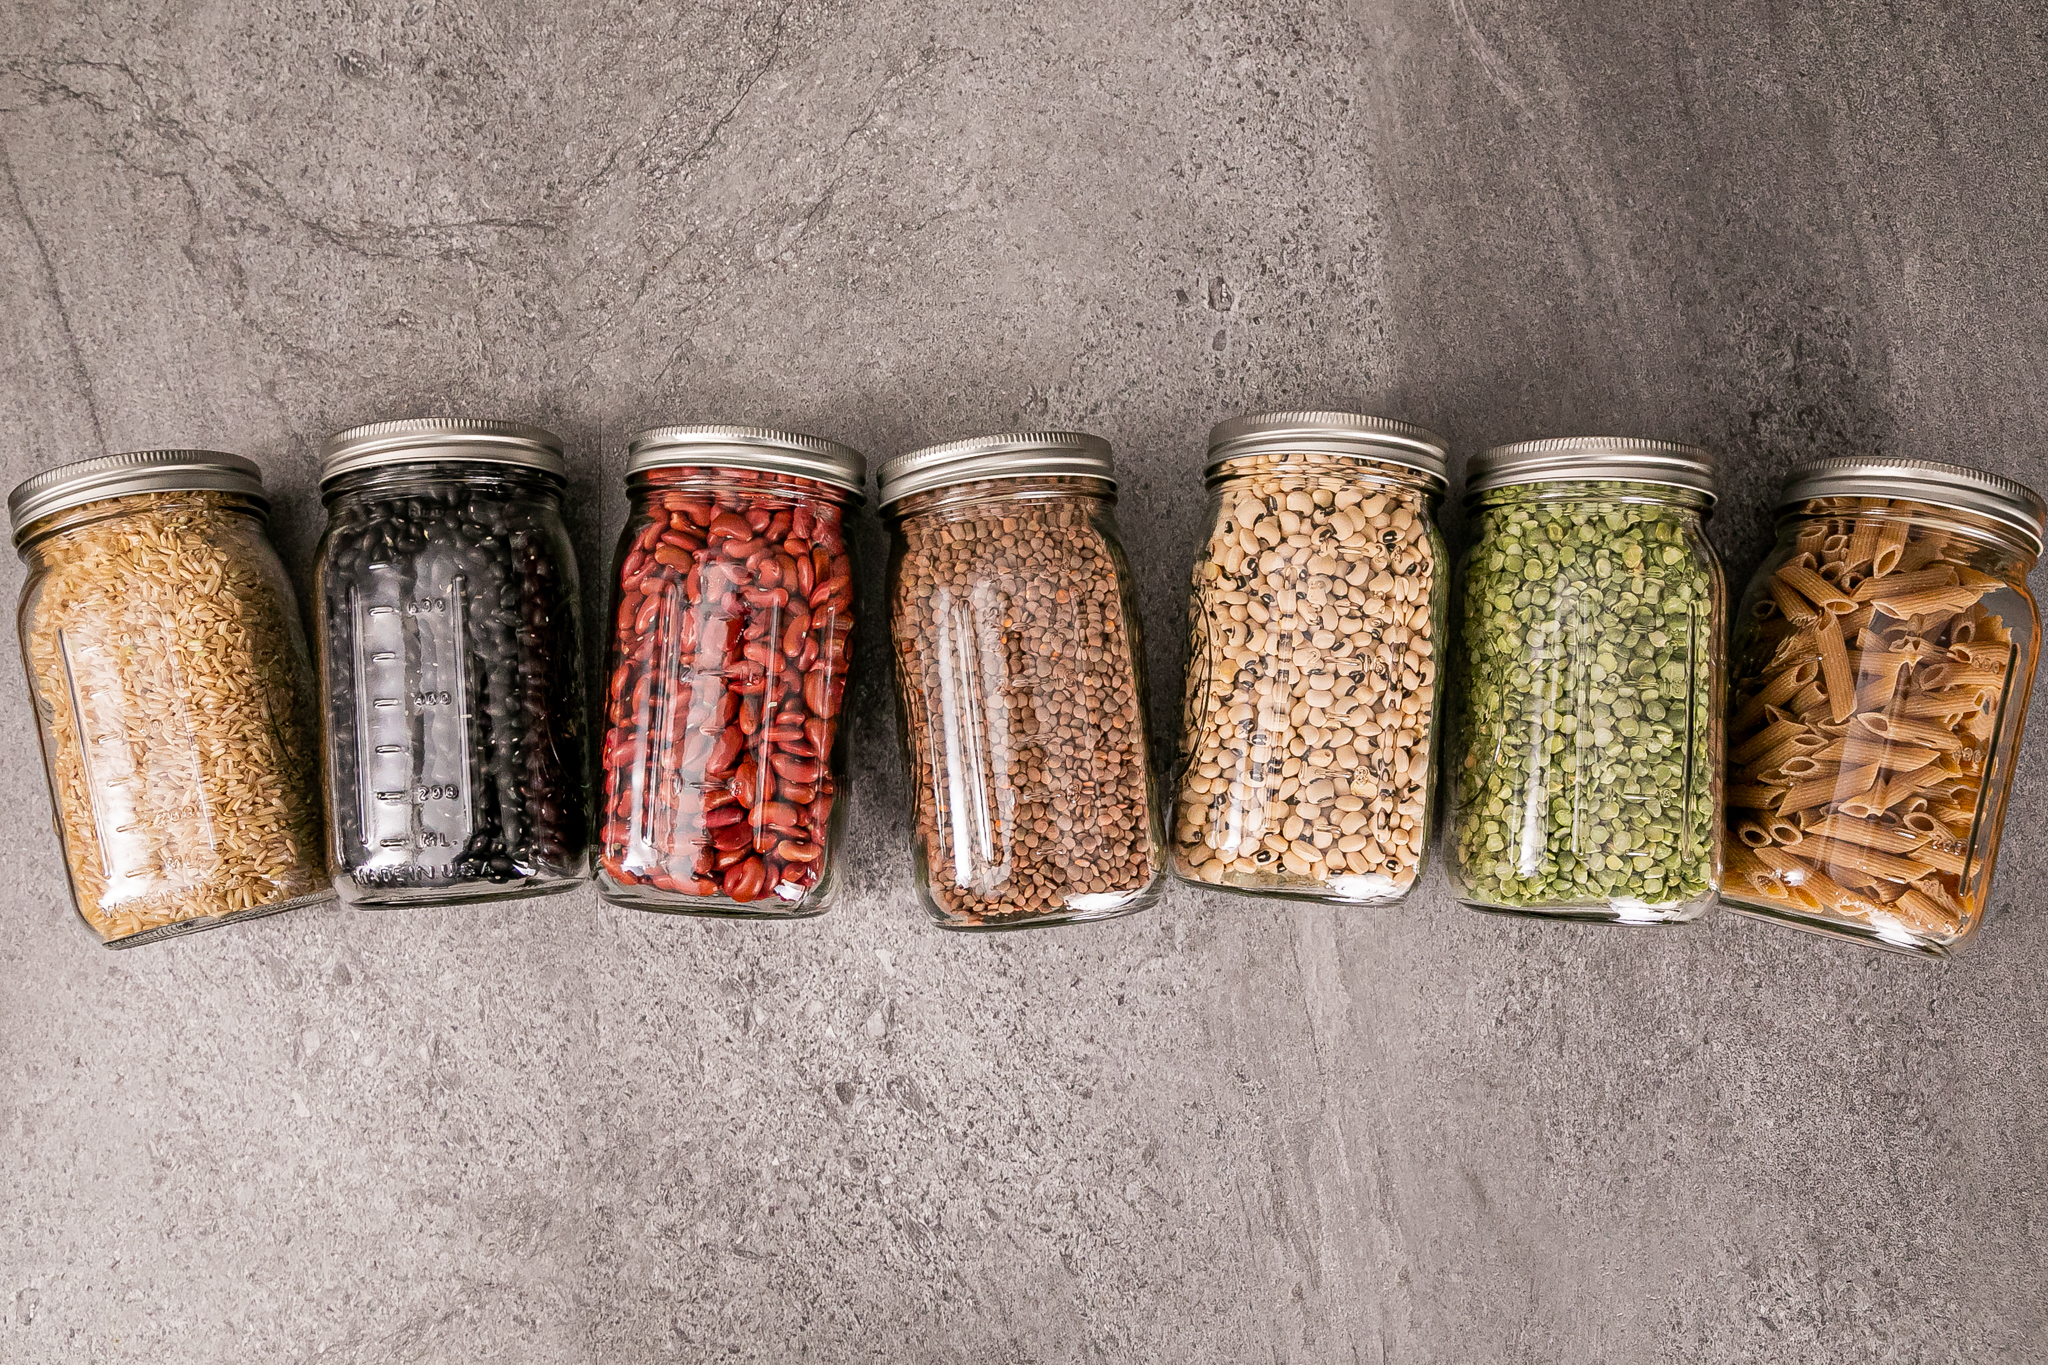
We want to eliminate some of the fear and provide solutions to help you prepare ahead of time to provide for your families and loved ones. This part of the Food Shortage Series, will be covering how to effectively store dry goods for long-term storage. Those dry goods include a variety of dried beans, rice, pasta, coffee beans, oats, salt, sugars, flours, and baby/infant formula, but you can vacuum seal any other dry goods you please!
There are many different methods that can be used to vacuum seal dry goods. The top methods we recommend using are vacuum sealed mason jars, vacuum canisters, vacuum sealer bags or rolls, chamber pouches, or mylar bags. Although there are many methods, not one is better than the other, and dry goods can be vacuum sealed using any of the various methods.
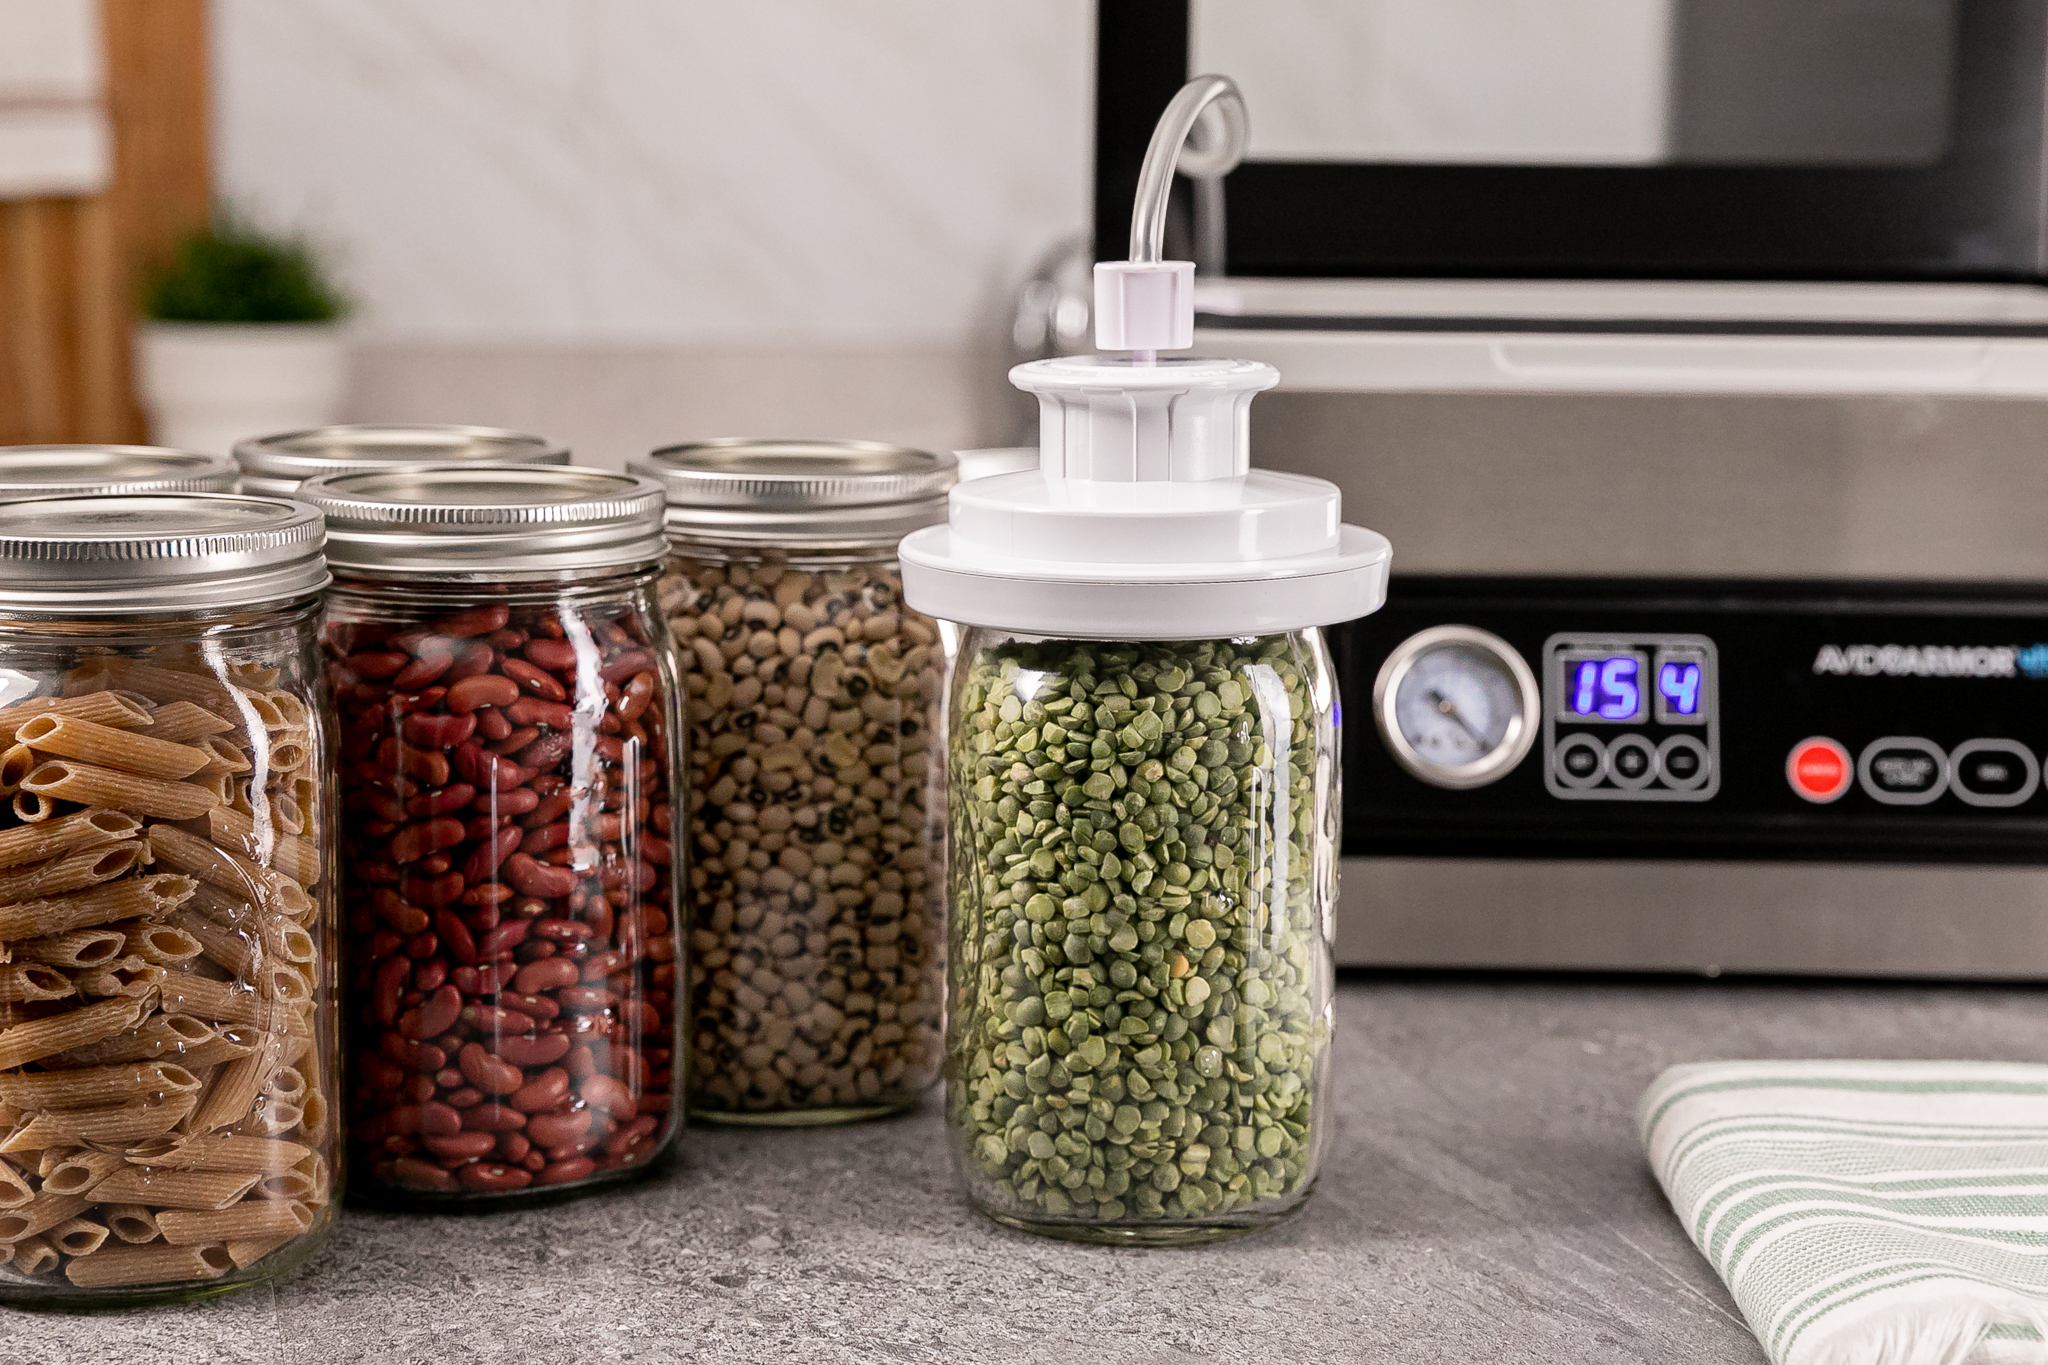
How to Vacuum Seal Dry Goods Using a Mason Jar:
Depending on the type of vacuum sealer you have, that would determine how you can successfully vacuum seal dry goods in a tempered-glass Ball jar or Mason jar.
If you have a suction-type vacuum sealer like the Avid Armor AVS7900, A100, A420, or the Magic Vac Maxima 2 or Jumbo 30 Evo Plus, you would have to use the accessory port and a jar hood attachment, such as the Magic Vac Wide-Mouth Jar Vacuum Sealing Hood.
Steps to Use a Vacuum Sealing Hood:
1. Once the dry goods are in the wide-mouth mason jar, place the flat lid cap ONLY on the jar.
2. Set vacuum sealing hood over the flat lid cap.
3. Attach one end of the accessory hose to the port in the vacuum sealer and the other end of the hose in the top of the vacuum sealing hood.
4. Use the ‘Canister’ or ‘Accessory’ function on the vacuum sealer.
5. Once the vacuum cycle is complete, take off the vacuum sealing hood and tighten the mason jar ring around the top of the jar.
6. The mason jar is ready for long-term storage.
>>> Check out more photo & video content on our Instagram! <<<
If you have a chamber vacuum sealer like the Avid Armor USV20 or USVX with an accessory port, use the steps below.
Steps to Use a Vacuum Sealing Hood with Chamber Vacuum Sealer:
1. Once the dry goods are in the wide-mouth mason jar, place the flat lid cap ONLY on the jar.
2. Set vacuum sealing hood over the flat lid cap.
3. Attach one end of the accessory hose to the port in the vacuum sealer and the other end of the hose in the top of the vacuum sealing hood.
4. Hold down the ‘Auto Vac & Seal’ button to start the accessory function.
5. Once the vacuum cycle is complete, take off the vacuum sealing hood and screw the mason jar ring around the top of the jar.
6. The mason jar is ready for long-term storage.
*If you do not have a vacuum sealing hood attachment, you can still vacuum seal Ball or Mason jars inside of a chamber sealer and here’s how.
See Steps Below.
For the USV20 or USVX, you can fit a pint-size jar on its side or a smaller size jar standing up in the chamber.
The USV32 does not contain an accessory port. To vacuum seal mason jars, they would have to be placed inside the chamber. The largest size mason jar the USV32 can hold is a quart-size jar on its side or a smaller size jar standing up.
*Be cautious that whatever size jar you choose to vacuum seal on its side inside the chamber, so it fits properly with the machine’s lid closed.
Steps to Vacuum Seal a Mason Jar Inside a Chamber Vacuum Sealer:
1. Once the mason jar is ready for sealing, place the flat lid on it.
2. Loosely place the ring around the mason jar lid.
3. Press the ‘Auto Vac & Seal’ Button.
4. Once the cycle is complete, remove the mason jar and tighten the ring.
5. Your jar is ready for long-term storage.
How to Vacuum Seal Mason Jars in Seconds
If you have a suction-type vacuum sealer or a chamber vacuum sealer with an accessory port, the mason jars can also be vacuum sealed inside a vacuum canister set, like the Avid Armor 3-Piece Canister Set. The largest canister in the set can fit up to a quart-sized mason jar.
Steps to Vacuum Seal a Mason Jar Inside a Vacuum Canister:
1. Place the mason jar with the flat lid on and the ring loosely placed around the jar lid into the canister.
2. Put the canister lid on with the accessory hose connected to both the lid and the sealer accessory port.
3. Turn the canister dial to ‘Sealed’.
4. Run the ‘Canister’ or ‘Accessory’ cycle on a suction-type sealer or hold down the ‘Auto Vac & Seal’ button on a chamber sealer.
5. Remove the mason jar and tighten the ring around the jar lid.
6. Your jar is ready for long-term storage.
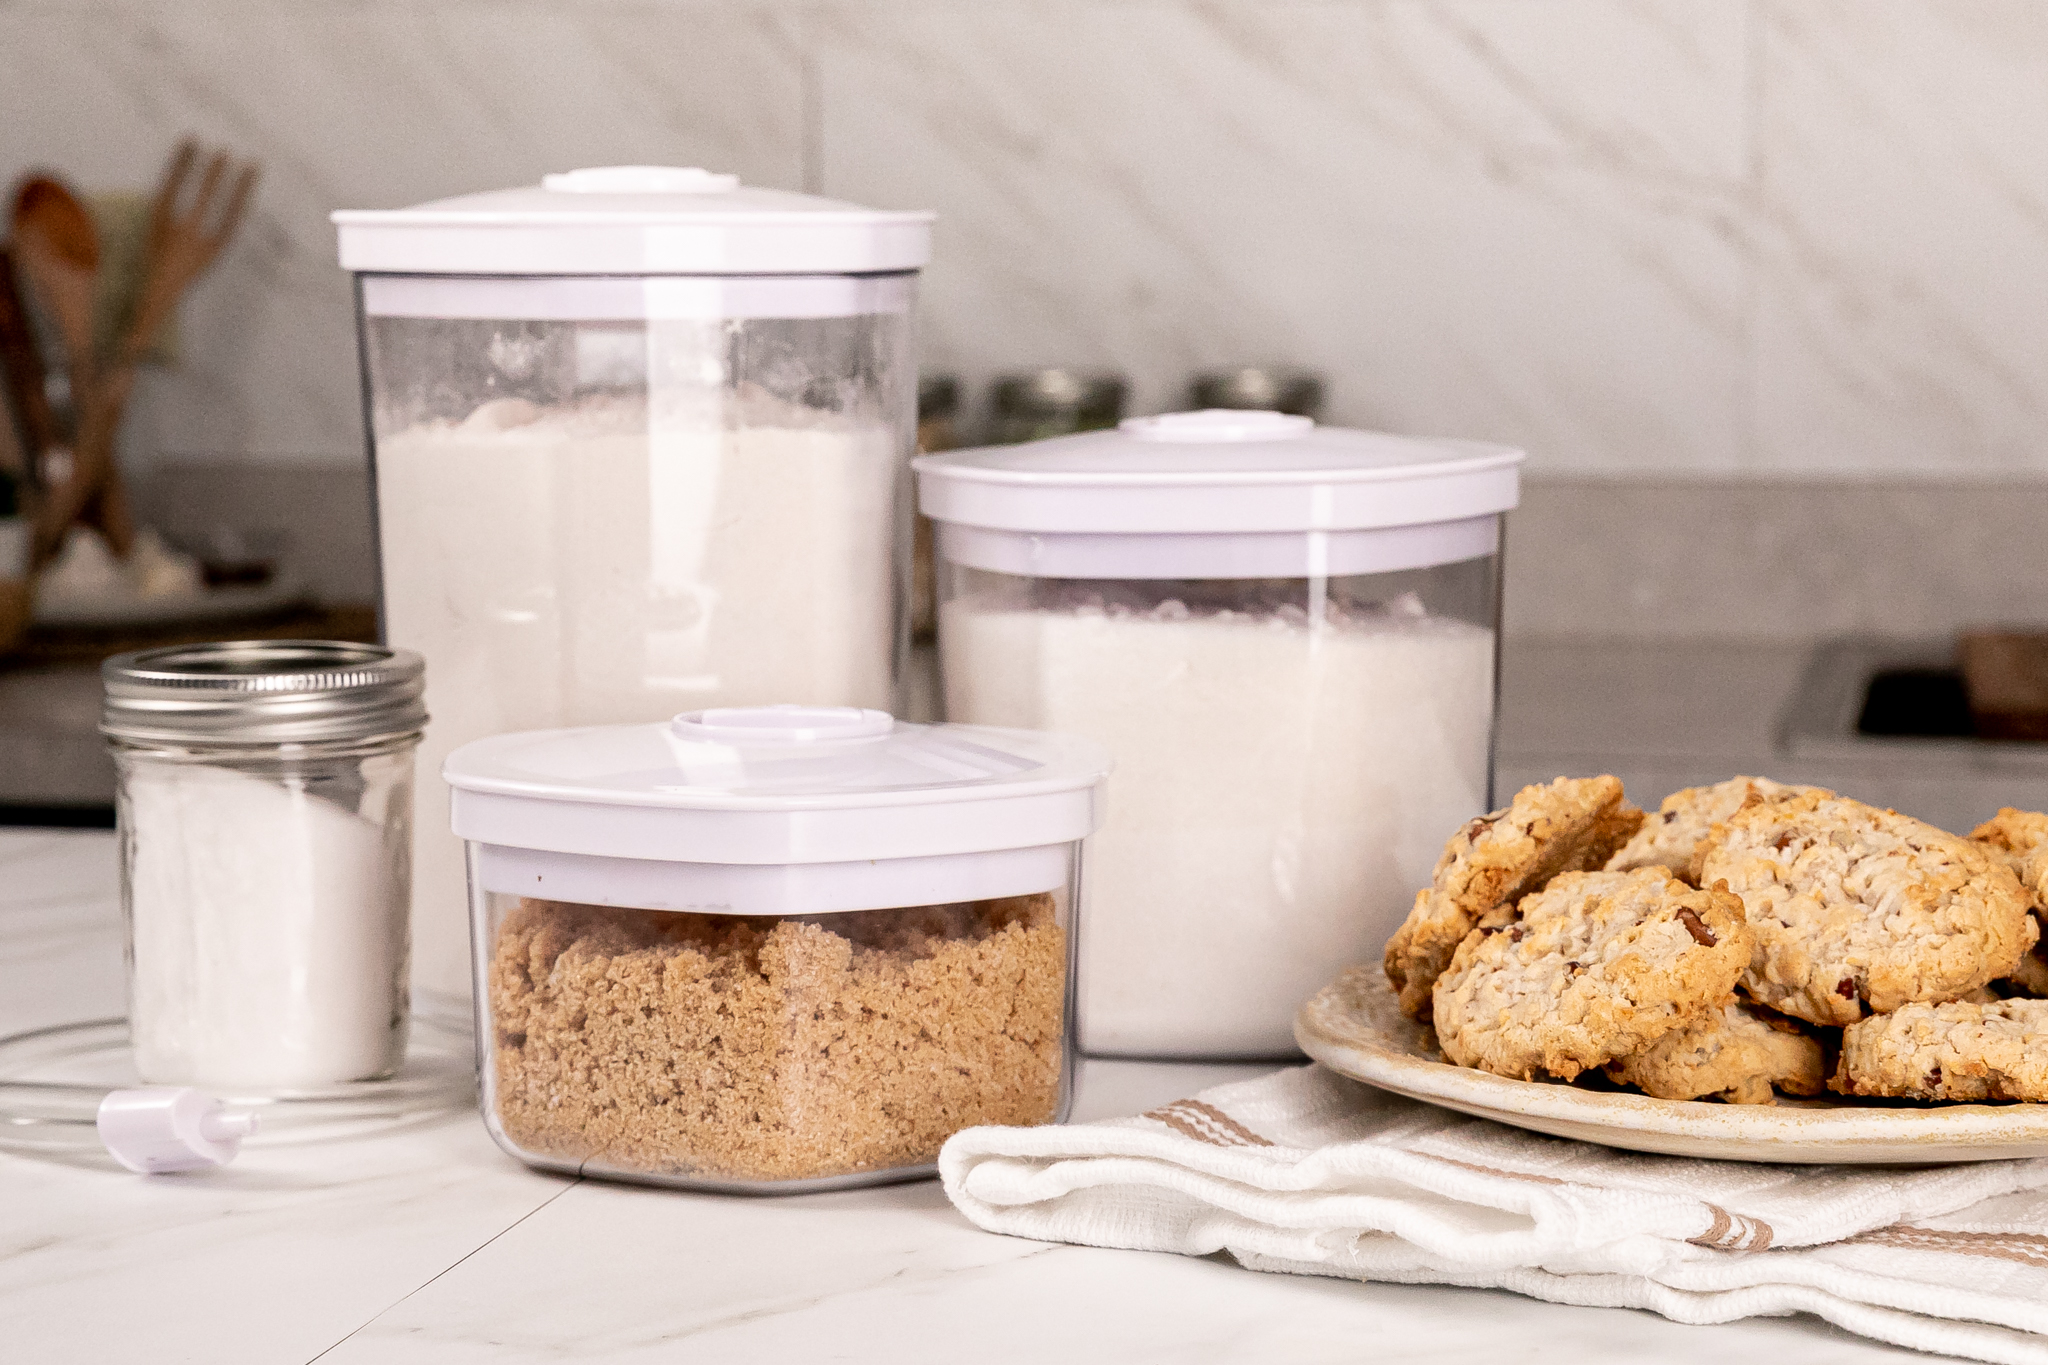
How to Vacuum Seal Dry Goods Using Canisters:
The Avid Armor 3-Piece Canister Set is a great option for storing dry goods such as different varieties of flours and sugars. The set includes a large (2L) canister, a medium (1.4L) canister, and a small (0.7L canister), which will create an airtight seal using any vacuum sealer that has an accessory/canister function. These can help protect your dry goods for long-term use.
Steps to Vacuum Seal a Vacuum Canister:
1. Once the dry goods are placed in the canister, put the lid on.
2. Turn the canister dial to ‘Sealed’.
3. Attach the accessory hose to the lid and the accessory port on the sealer.
4. Run the ‘Canister’ or ‘Accessory’ cycle.
5. Once complete, the canister is ready to be stored.
>>> Check out more photo & video content on our Instagram!<<<
How to Vacuum Seal Dry Goods Using Vacuum Sealer Bags & Rolls:
If vacuum sealing flour, baby formula, or any powdery dry good in a vacuum bag using the Avid Armor AVS7900, A100, or A420, or the Magic Vac Maxima 2 or Jumbo 30 Evo Plus, do not fill up more than 50% of the bag, so the powder does not approach the seal area or see the tips below.
*If you are worried about making a mess with a powdered dry good, there are two tips you can follow.
1. Place the contents in a brown paper-type bag before putting it in a vacuum sealer bag to vacuum seal.
2. Place the contents in a vacuum sealer bag folding over the top before putting in a second vacuum bag and vacuum sealing.
The largest Avid Armor vacuum bag is gallon size (11”x16”), and if a larger quantity is desired to seal, use vacuum sealer rolls to make a custom bag size.
How to Vacuum Seal Flour | Vacuum Sealing Dry Goods
How to Vacuum Seal Dry Goods Using Chamber Pouches:
Vacuum sealing using chamber pouches is a similar process to using vacuum sealer bags, however, chamber pouches are only compatible with chamber vacuum sealers.
Steps to Vacuum Seal Dry Goods Using Chamber Vacuum Sealers:
1. Place the dry goods into a chamber pouch leaving 3+ inches of headspace.
2. Put the pouch into the chamber placing it correctly to ensure the end of the bag is not being pinched off and placed smoothly over the seal bar.
3. Close the chamber lid.
4. Press the ‘Auto Vac & Seal’ button to run a vacuum cycle.
5. Once the cycle is complete, your pouch is ready for long-term storage.
How to Vacuum Seal Dry Goods Using Mylar Bags:
Suction-type vacuum sealers cannot vacuum seal mylar bags, however, the Avid Armor Ultra Series Chamber Sealers can vacuum seal mylar bags up to 7mil thick.
Steps to Vacuum Seal Dry Goods Using Mylar Bags in a Chamber Sealer:
1. Place the dry goods into a mylar bag leaving 3+ inches of headspace.
2. Put the mylar bag into the chamber placing it correctly to ensure the end of the bag is not being pinched off and placed smoothly over the seal bar.
3. Close the chamber lid.
4. Adjust the seal time setting that would be adequate for the mylar bag you are using.
5. Press the ‘Auto Vac & Seal’ button to run a vacuum cycle.
6. Once the cycle is complete, your pouch is ready for long-term storage.
How to Vacuum Seal Mylar Bags Using the USV32

>>> Check out more photo & video content on our Instagram! <<<
Implementing these storage methods into your homes to prepare for any food shortages will have you stocked up with a pantry full of dry goods that are protected from spoiling or becoming stale. Vacuum sealing keeps dry goods fresh longer than traditional non-vacuum storage methods, so don’t miss out and start prepping today!