How to Butcher a Deer Hind Quarter *EVERY CUT EXPLAINED*
Posted by Avid Armor | Outdoors Allie on Apr 12th 2024
In this blog, we will delve into the meticulous process of butchering an entire hind quarter of a whitetail doe, harvested by Allie D’Andrea (Outdoors Allie). The hind quarter presents an array of possibilities, making it one of the most intriguing parts of a wild game animal. With each cut of meat, we’ll explore Allie’s preferred cooking methods and her technique for vacuum sealing. Additionally, while the focus is on deer, the techniques discussed apply to other hoofed game animals like elk, antelope, and moose, thanks to their similar muscle structures, albeit varying in size. Whether you’re an expert hunter or just starting out, our expert advice and thorough explanations will enable you to make precise cuts and elevate your butchering skills.
Preparing Your Workstation:
Before diving into butchery, ensure you have a clean and organized workspace. Gather your tools, including a sharp boning knife, cutting board, and protective gloves. Having the right knife is crucial for any butchering task. Allie suggests the boning knife be 6”-8” (inches) in length for its precision and ease of use. A sturdy surface and good lighting are essential for this process.
Removing the Hind Quarter:
Start by positioning the deer on its side, then locate the hip joint. Using your knife, carefully cut through the joint to separate the hind quarter from the rest of the carcass. Take your time to avoid damaging the meat.
Breaking Down the Hind Quarter:
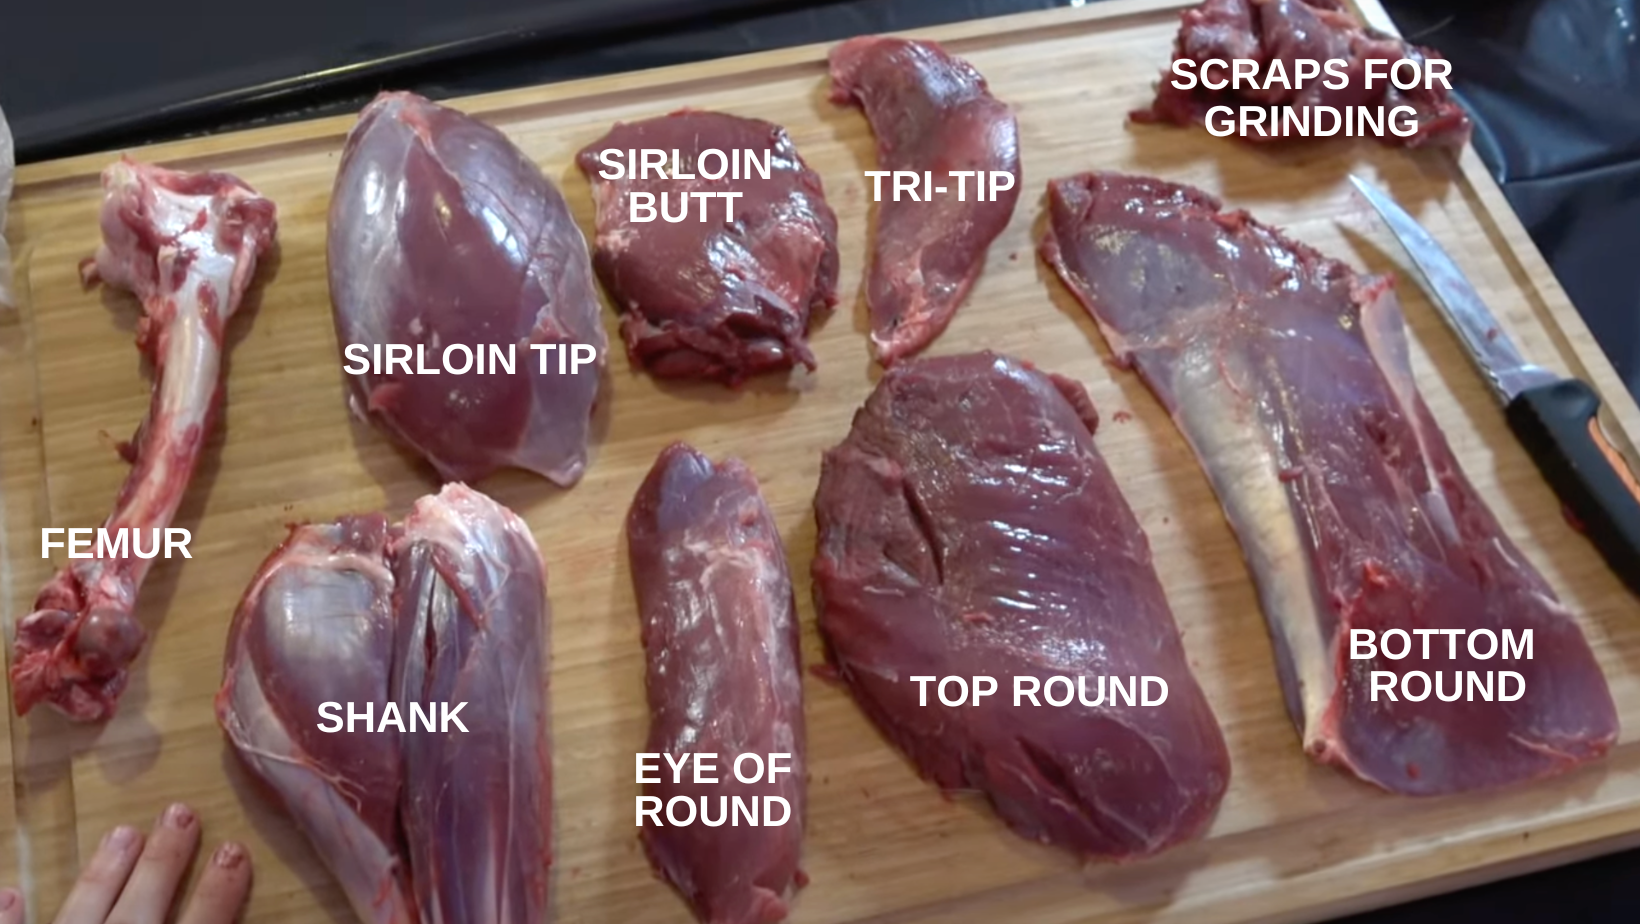
When starting the butchering process of the hind quarter, make sure the outside of the leg is what is facing upward. Identify the major muscle groups, such as the shank, femur, round, and sirloin. Each section offers unique cuts for various culinary applications.
The first cut of meat being removed is the shank.
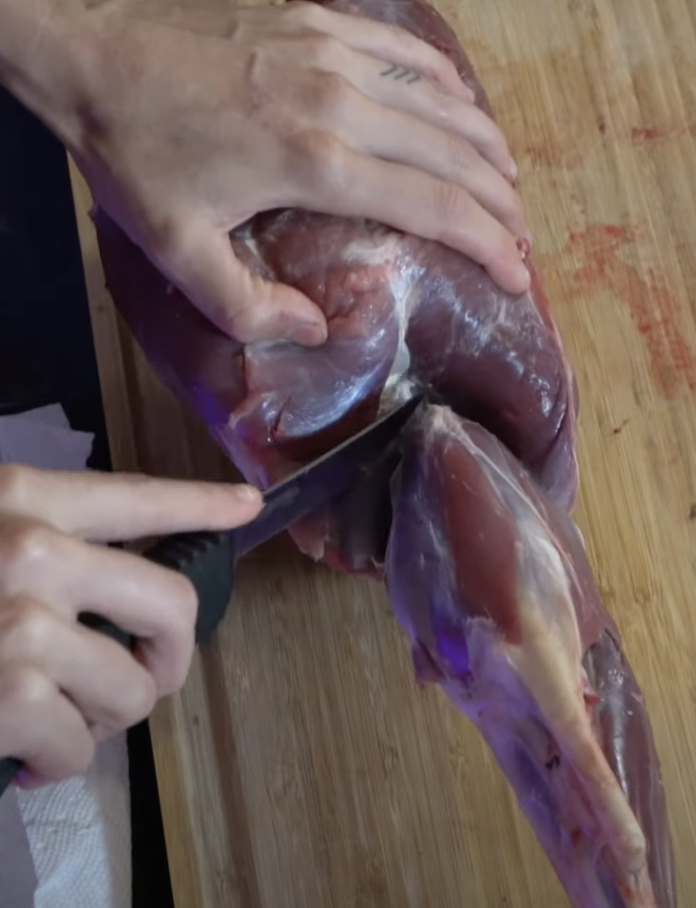
1. Begin by identifying the transition point where the white fat meets the red meat.
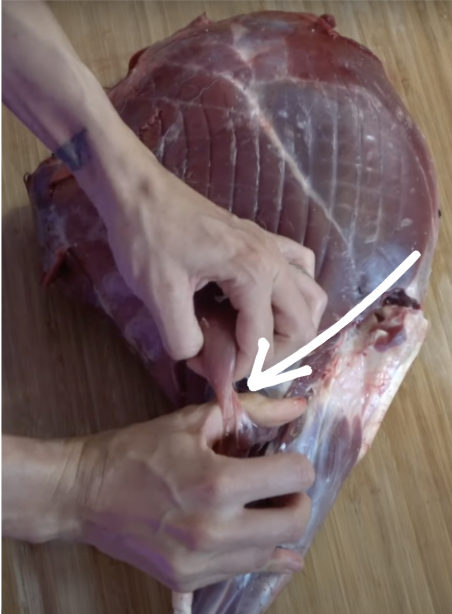
2. Using your knife, carefully work your way around the meat, following the line where the white fat meets the pink muscle. Continue tracing this line down along the bone to release the top piece of meat.
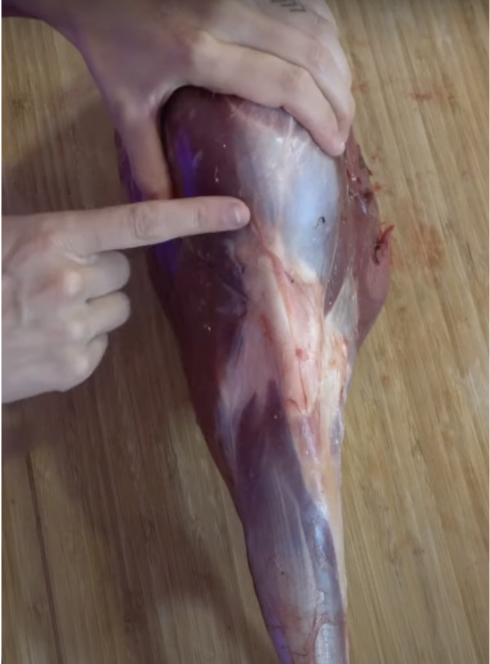
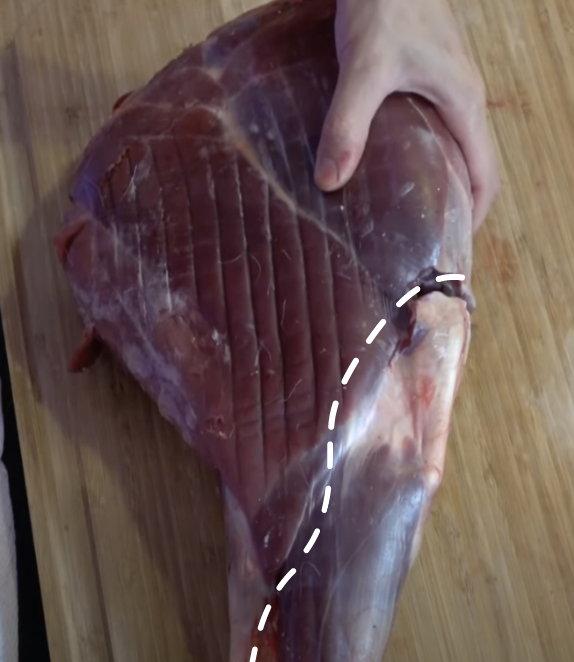
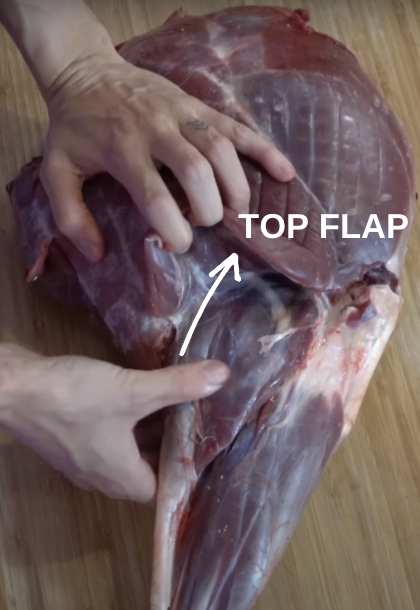
3. After freeing the top piece of meat, use your fingers to separate the fascia. Then, with your knife, carefully cut through to expose one of the larger meat portions that extends down the shank.
Note: Ensure you exclude the top flap of meat from your shank cut. To achieve this, gently pull it back until the muscle’s descending point is visible.
4. Turn the hind quarter over and repeat the process on the other side, ensuring to cut along the seam without incorporating the top muscle portion of the shank. Cut through the fascia, then continue along the inside to follow the line where the white part of the bone meets the meat, separating it from the connective tissue.
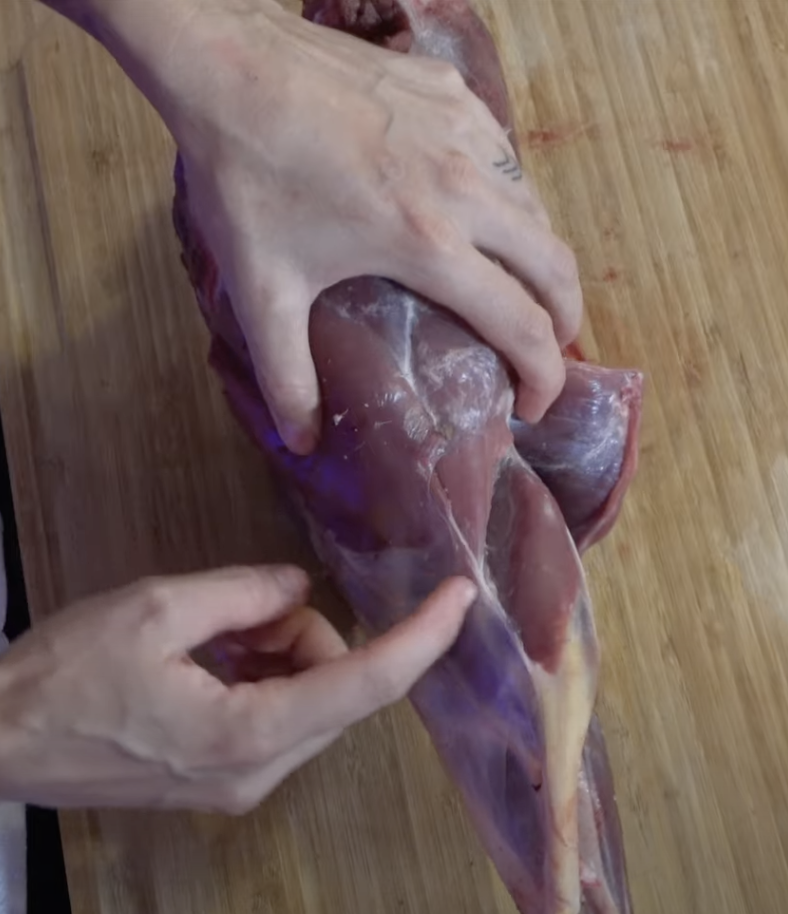
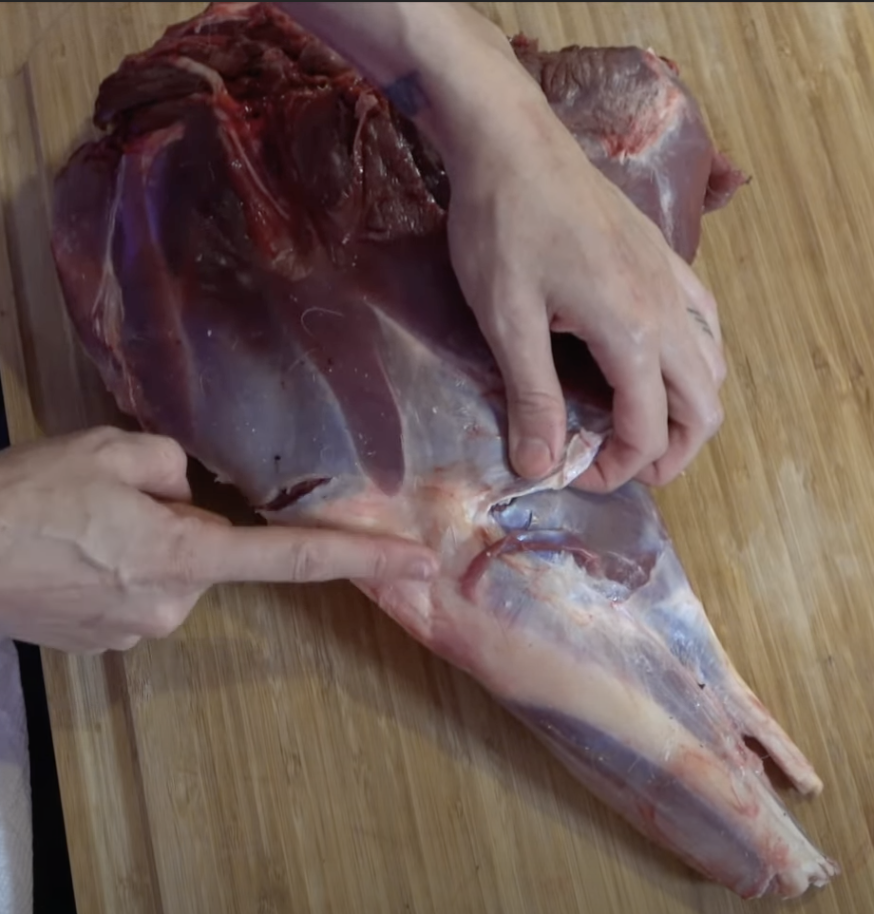
5. Slice down along the back to detach the top muscles from the bone. Then, carefully navigate around the knee joint with your knife, ensuring precise cuts. Once the bone is detached, proceed to slice the remaining shank meat off the femur bone by running your knife along its length.
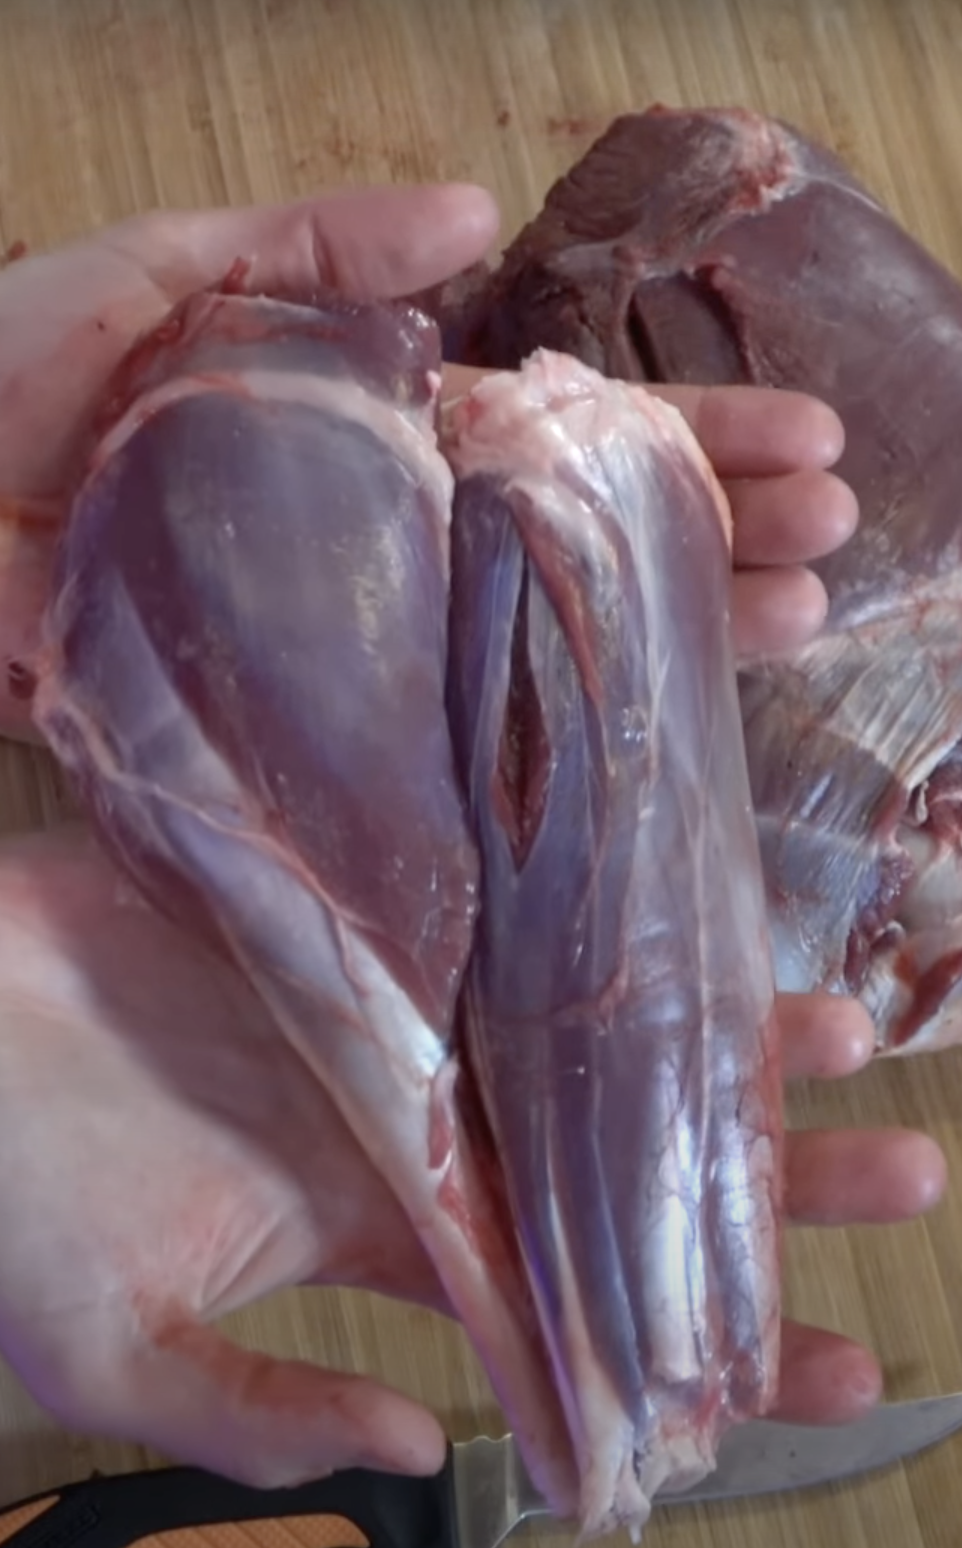
Optimal Utilization of Shank Meat
After successfully removing the shank, it’s essential to note that the shank meat is not tender. Therefore, the best options for preparing it are braising or grinding. If grinding is your preference, ensure to cut the meat away from the tendons. Additionally, if you enjoy making stock, consider saving the bones for that purpose.
The next step is to remove the femur bone.
1. Begin by cutting along the natural seam lines all the way down to the bone on the inside of the leg. When you reach the femur bone, as there is no seam to follow, carefully cut along the bone’s natural curvature to separate the meat from it.
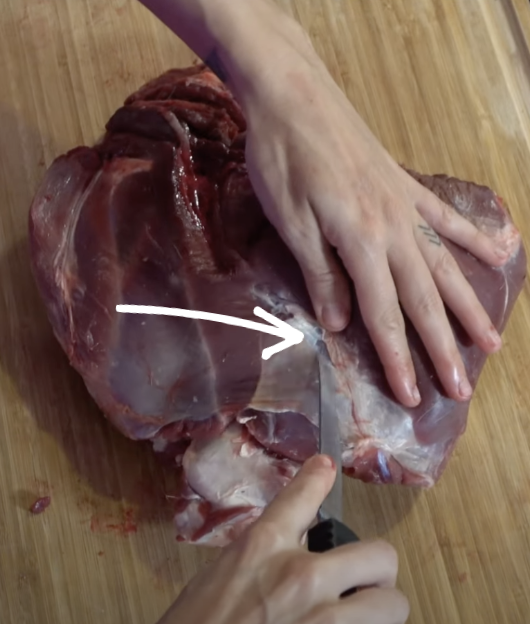
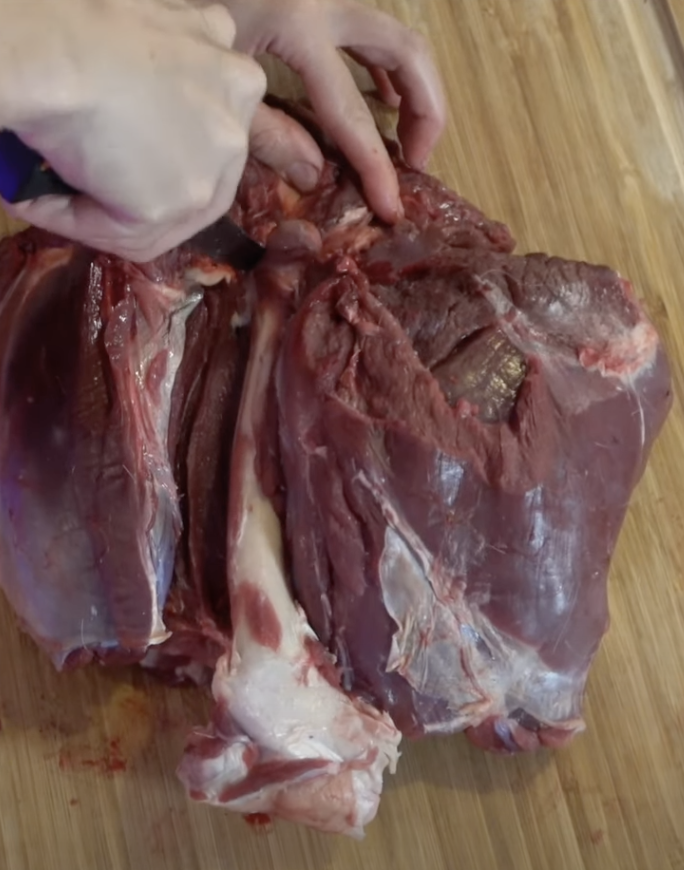
Optimal Utilization of Femur Bone
While the femur bone may not offer tender meat, its value extends beyond the kitchen. Consider utilizing femur bones to enhance the flavor and nutritional depth of homemade stocks and broths. Simmering these bones slowly with aromatics and vegetables yields a rich, savory base for soups, stews, and sauces. Additionally, the marrow nestled within the bone adds a richness when roasted and spread over crusty bread or incorporated in hearty dishes. Don’t overlook the culinary potential of the femur bones - they’re a flavorful foundation for elevating your culinary creations.
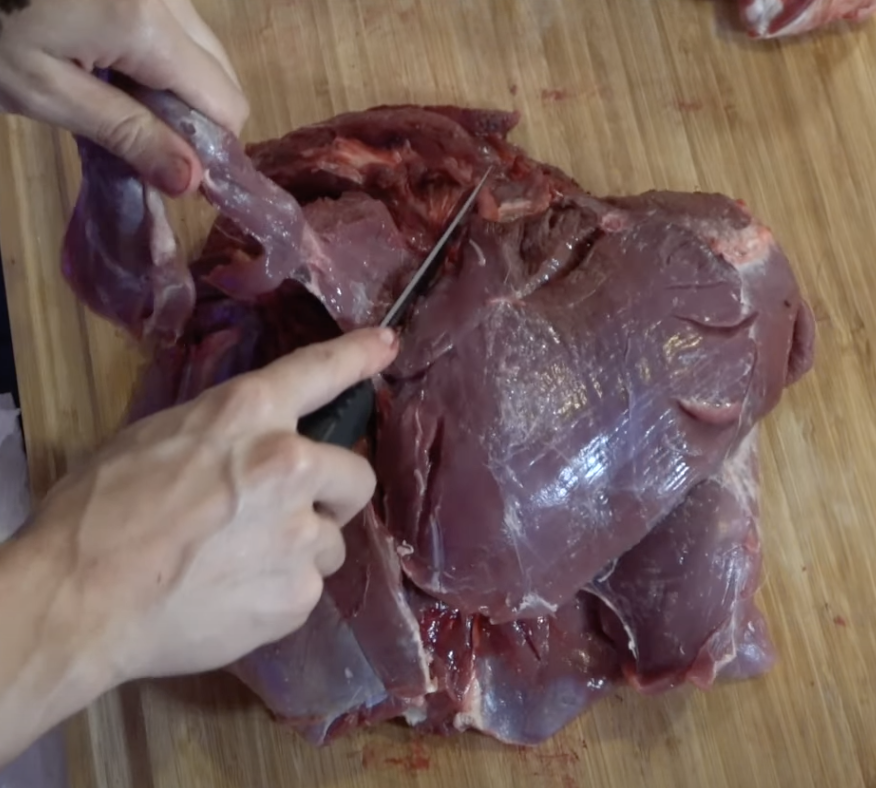
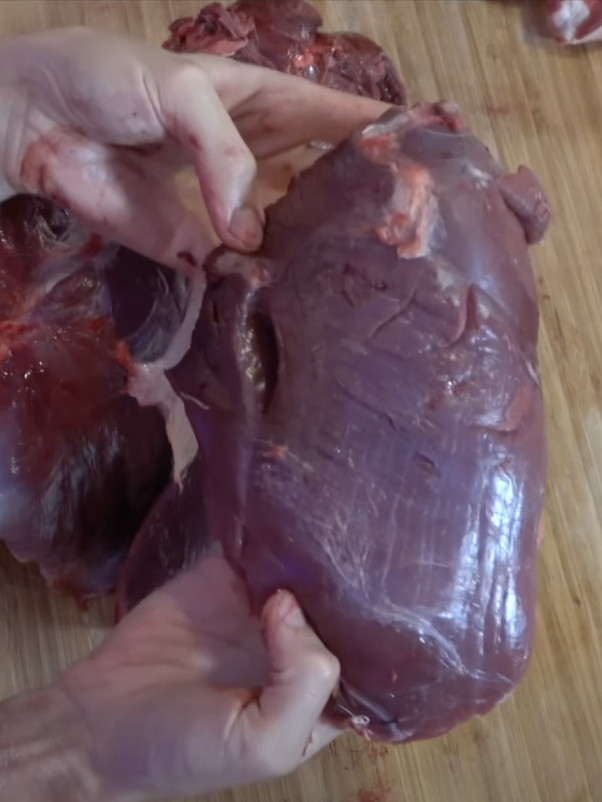
The next step is to remove the top round (inside round).
The top round stands out as one of the most tender cuts of meat from the entire hind quarter. It’s crucial to handle this cut with extra care, starting right from the field. When gutting the deer, be mindful not to split the pelvis, preserving as much of the top round as possible.
1. First, remove the muscle group situated atop the top round, which can be reserved for grinding purposes. Once this muscle group is separated, the outline of the top round becomes clearer. Proceed by cutting along the natural line beneath to fully detach the top round.
Optimal Utilization of Top Round
Whether stir-fried, sliced into succulent steaks, roasted to perfection, or ground for flavorful dishes, the top round delivers exceptional taste and texture. Stir-frying is particularly suitable, as the meat can withstand high temperatures and swift cooking methods, ensuring a tender and juicy outcome.
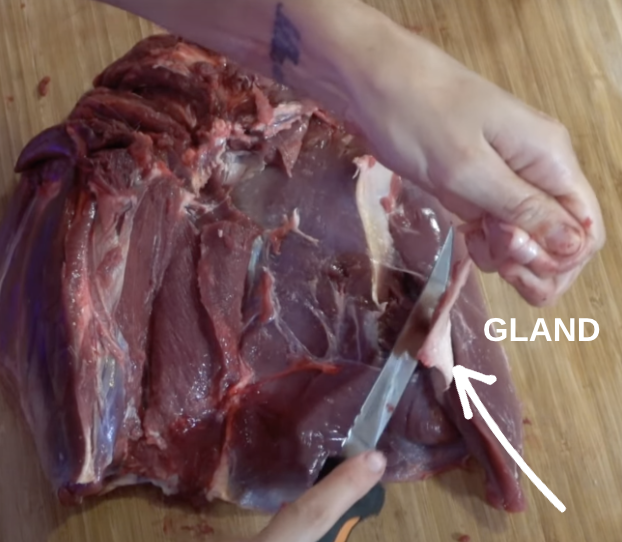
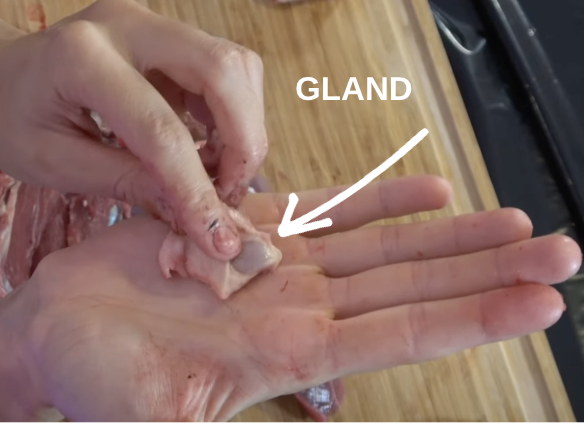
Next, remove the gland…yuck!
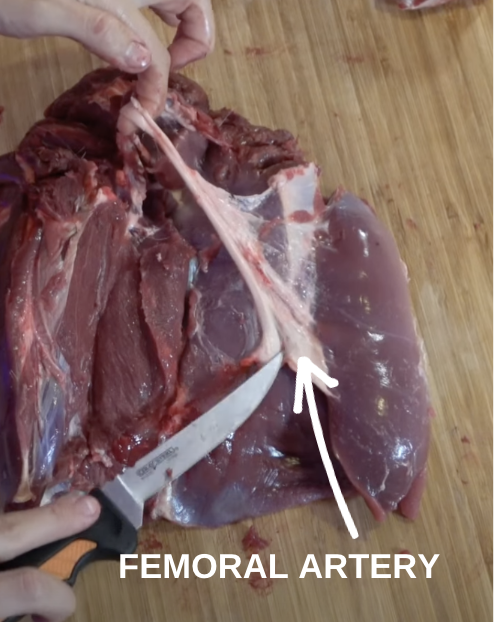
1. Identify the femoral artery and carefully sever it, ensuring not to disturb the gland nestled within a chunk of fat nearby. Avoid cutting through or touching the gland with your knife, as it could impact the flavor of the meat. Exercise caution to work around the gland while cutting the artery. Once the gland is removed, you’ll observe two distinct muscle groups beginning to take shape.
The next step is to remove the eye of round.
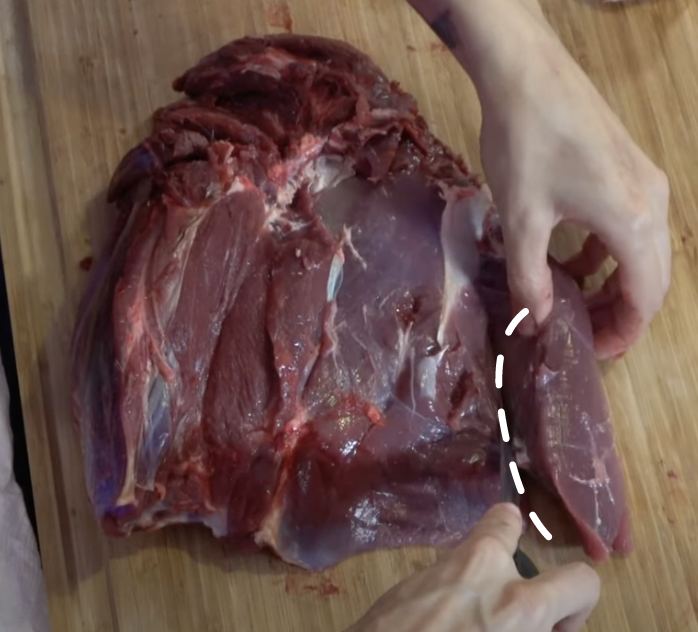
1. The eye of round, a relatively small cut from the hind quarter, can be easily seen. Once identified, proceed to separate it from the surrounding muscle groups with a straightforward cut.
Optimal Utilization of Eye of Round
The eye of round is a moderately tender cut of meat that is traditionally favored for roasting, grinding, inclusion in hearty stews, or crafting flavorful jerky. While more tender when sourced from young does, it tends to be tougher from mature bucks. However, if sourced from a young doe, it can also be incorporated into stir-fries, expanding its culinary versatility even further.
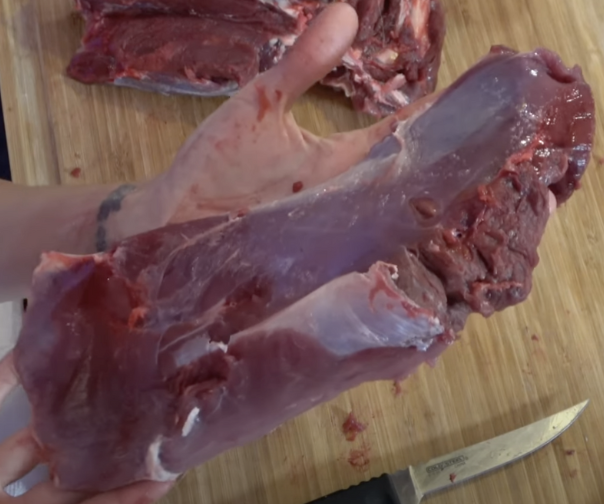
The next cut to remove is the bottom round.
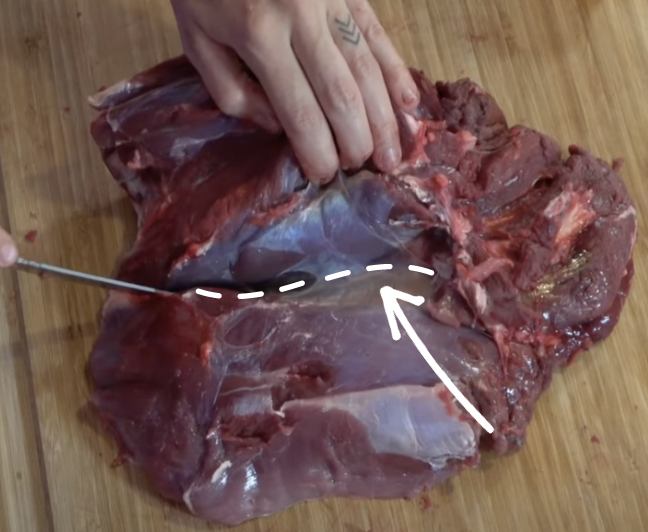
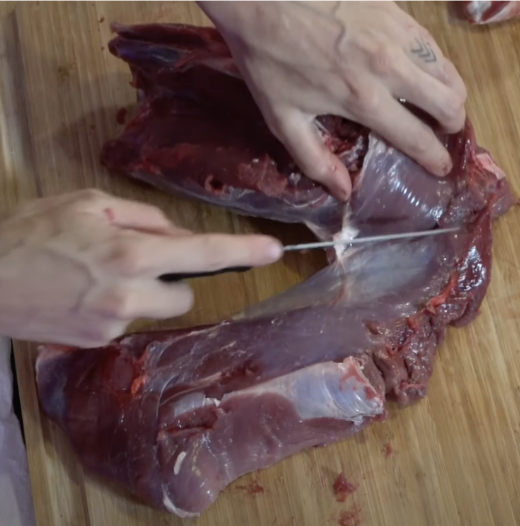
1. You will notice the seam between two sizable muscle groups; this is the area you’ll target to separate and remove the bottom round.
Optimal Utilization of Bottom Round
The bottom round, known for its lack of tenderness, benefits from a slow and gentle cooking approach, unlike more tender cuts that can withstand higher temperatures for quicker cooking. For optimal results, consider utilizing the bottom round in dishes that allow for prolonged cooking times, such as stews, pot roasts, or as a base for flavorful ground meat or jerky. This method ensures the meat becomes tender and succulent, enhancing its overall flavor and texture.
Now, we are at the final stage, with the sirloin tip, sirloin butt, and tri-tip remaining. These cuts can be easily distinguished and separated from each other.
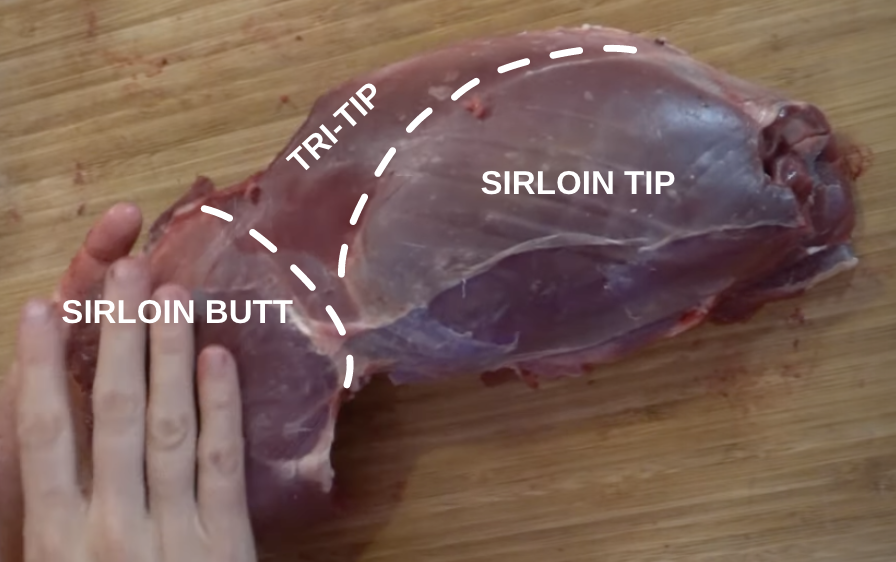
That being said, start with the sirloin tip.
1. Begin by identifying the football-shaped sirloin tip and tracing the natural seam that separates it from the tri-tip.
2. Then, carefully work around the side of the sirloin tip to detach it from the sirloin butt.
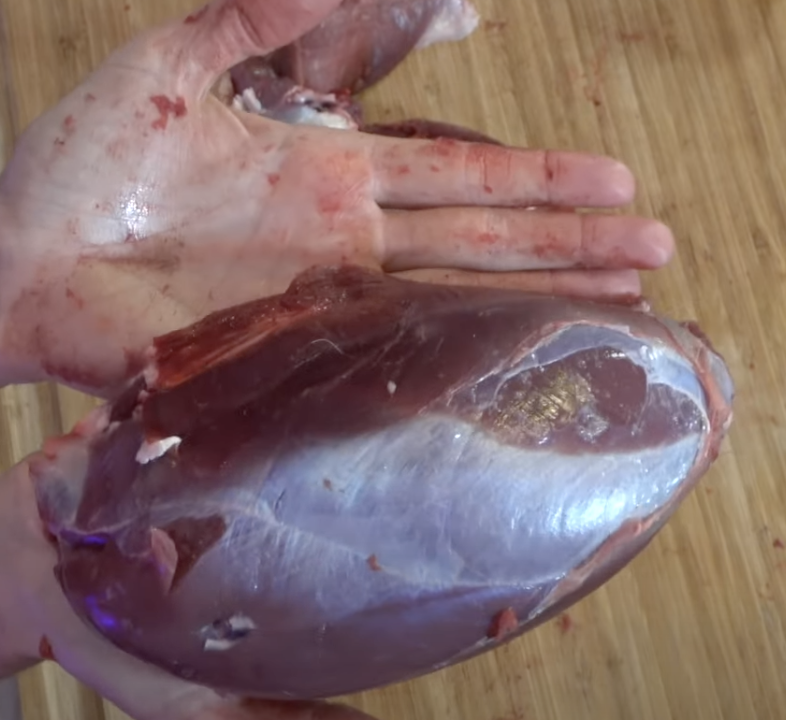
Optimal Utilization of Sirloin Tip
The sirloin tip, while not known for its tenderness, offers a robust flavor and versatility in various applications. Ideal for dishes requiring longer cooking times, such as stews and pot roasts, the sirloin tip transforms into tender, succulent meat when slow-cooked to perfection.
Next, remove the tri-tip.
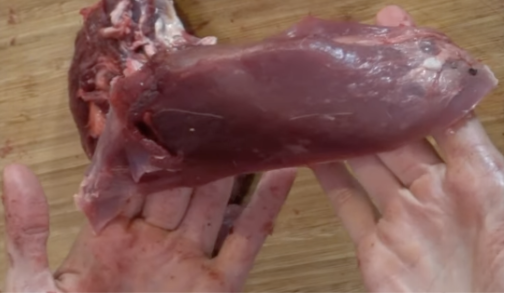
Optimal Utilization of Tri-Tip
The tri-tip, although not renowned for its tenderness, possesses a robust flavor profile that lends itself well to various applications. While it may not be the most tender cut, its versatility shines when utilized for grinding purposes. Ground tri-tip offers a flavorful base for a multitude of dishes, including burgers, meatballs, tacos, and meatloaf.
You are now left with the sirloin butt.
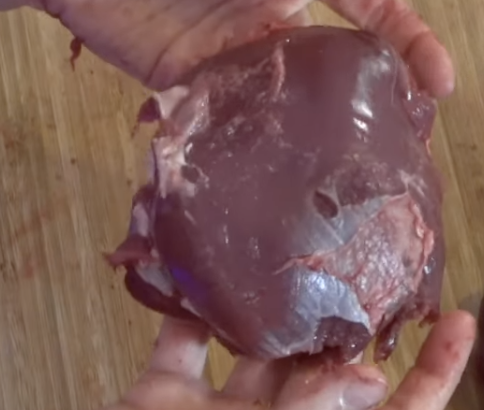
Optimal Utilization of Sirloin Butt
This particular cut originates from the uppermost part of the hind quarter of the deer, positioned at a prime location that ensures remarkable tenderness. However, its unique shape presents a challenge when it comes to traditional steak cuts. Instead, this cut shines when sliced thinly for stir-fry dishes. The tenderness of the meat, combined with its distinct flavor profile, makes it an ideal choice for stir-fry preparations. Slicing it thinly ensures quick and even cooking.
Storing and Freezing:
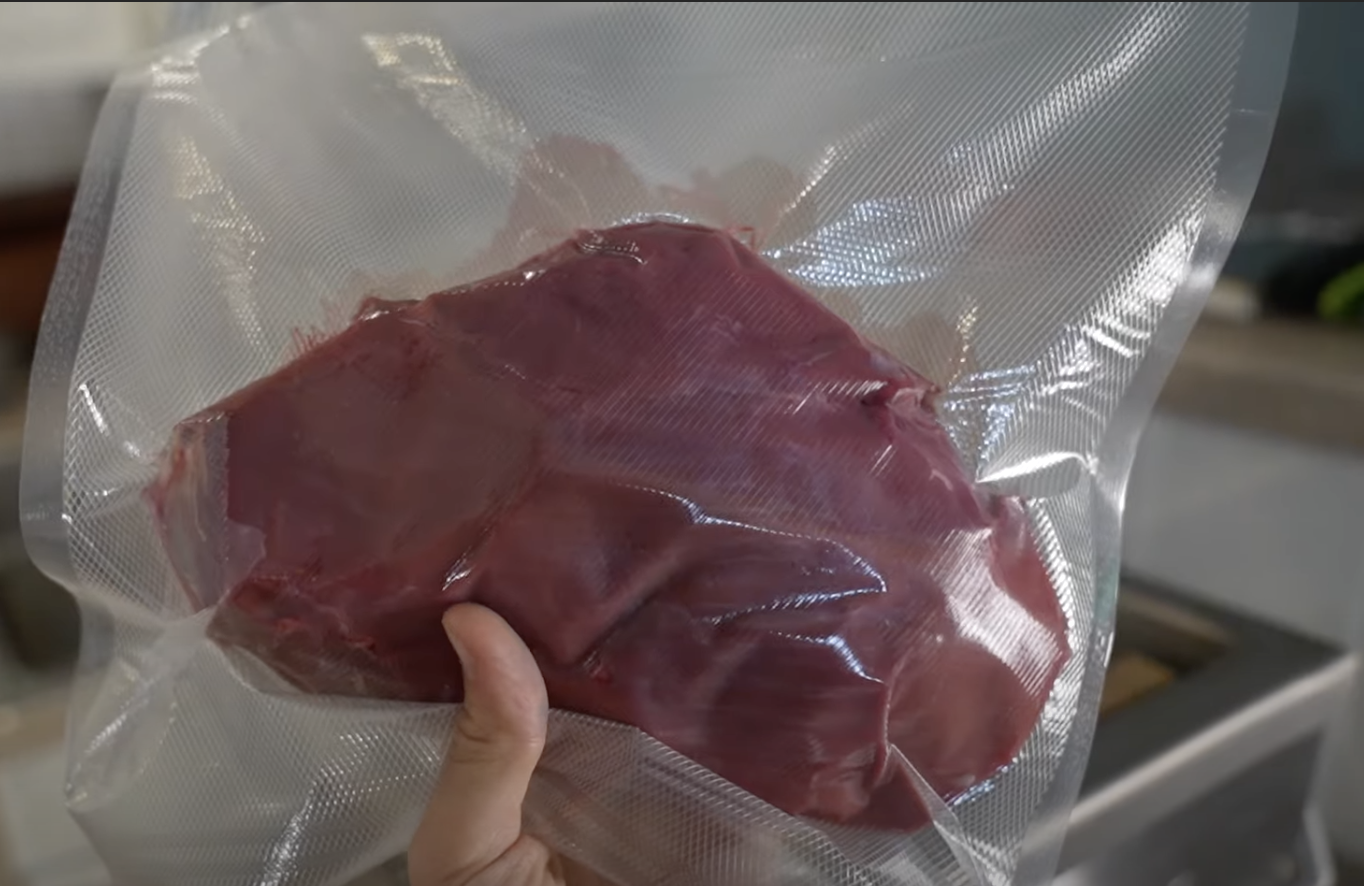
Now that the at-home butchering process is complete, the last step is to package it for freezer storage. Vacuum sealing is crucial for preserving the meat’s quality and freshness, surpassing traditional freezer storage methods such as plastic bags or butcher paper.
By removing the air from the packaging, vacuum sealing helps prevent freezer burn and oxidation, ensuring that the meat maintains its flavor, texture, and nutritional value for longer periods of time. This is particularly important for delicate cuts like those from the very top of the hind quarter, which are prized for their tenderness and flavor.
For optimal storage, it’s recommended to vacuum seal each cut of meat individually and ensure proper labeling with the date.
While Allie prefers vacuum sealer rolls for customizable bag sizes, Avid Armor also offers pre-cut vacuum bags and chamber pouches, accommodating bag sizes up to 11”x16”.
In the demonstration, Allie left approximately 3” of headspace above the meat to allow for a tight vacuum seal. Before initiating the vacuum cycle, it’s essential to ensure the sealing area is dry and residue-free; a paper towel or a tea towel can be used for this purpose. Additionally, Allie placed a towel in the chamber to occupy space, a helpful tip for achieving a tight vacuum, especially when sealing smaller items. Once the vacuum cycles are completed, labeling the bags and storing them in the freezer concludes this efficient preservation process.
Processing your own game offers immense satisfaction and reward. The sense of self-sufficiency, the opportunity to savor fresh, high-quality game meat, the ability to provide nourishing meals for your family, and the preservation of the game you’ve worked so hard for all culminate in a truly gratifying experience!

Follow Outdoors Allie (Allie D'Andrea) for more hunting and outdoors related content!
Business Email: Outdoorsallie@gmail.com
YouTube: Outdoors Allie
Instagram: outdoors_allie
Facebook: Outdoors Allie
Tik Tok: outdoors_allie
Check out Allie's Cookbook!
